Expense reimbursements
How to get reimbursed for expenses?
You can request a reimbursement for reasonable expenses incurred on behalf of IFT during the project's development. You can read about some of these expenses at:
It's essential that you carefully read the following instructions to get reimbursed so we can file expenses correctly. To get your expenses reimbursed correctly and on time:
- Ensure that you get your purchase or travel request approved by your budget owner via Discord, email, or other means of communication.
- After the purchase or travel, submit the expense receipts to Expensify
- Add these expenses to your monthly invoice sent to
[email protected]
In addition to these notes, you can find a guide here and you can also view our video walkthrough here.
How to report expenses through Expensify
We use Expensify to store and report the expense details and receipts incurred on behalf of IFT during the project's development. Please note that this guide is based on the current version of Expensify and not the new Expensify experience.
Account setup
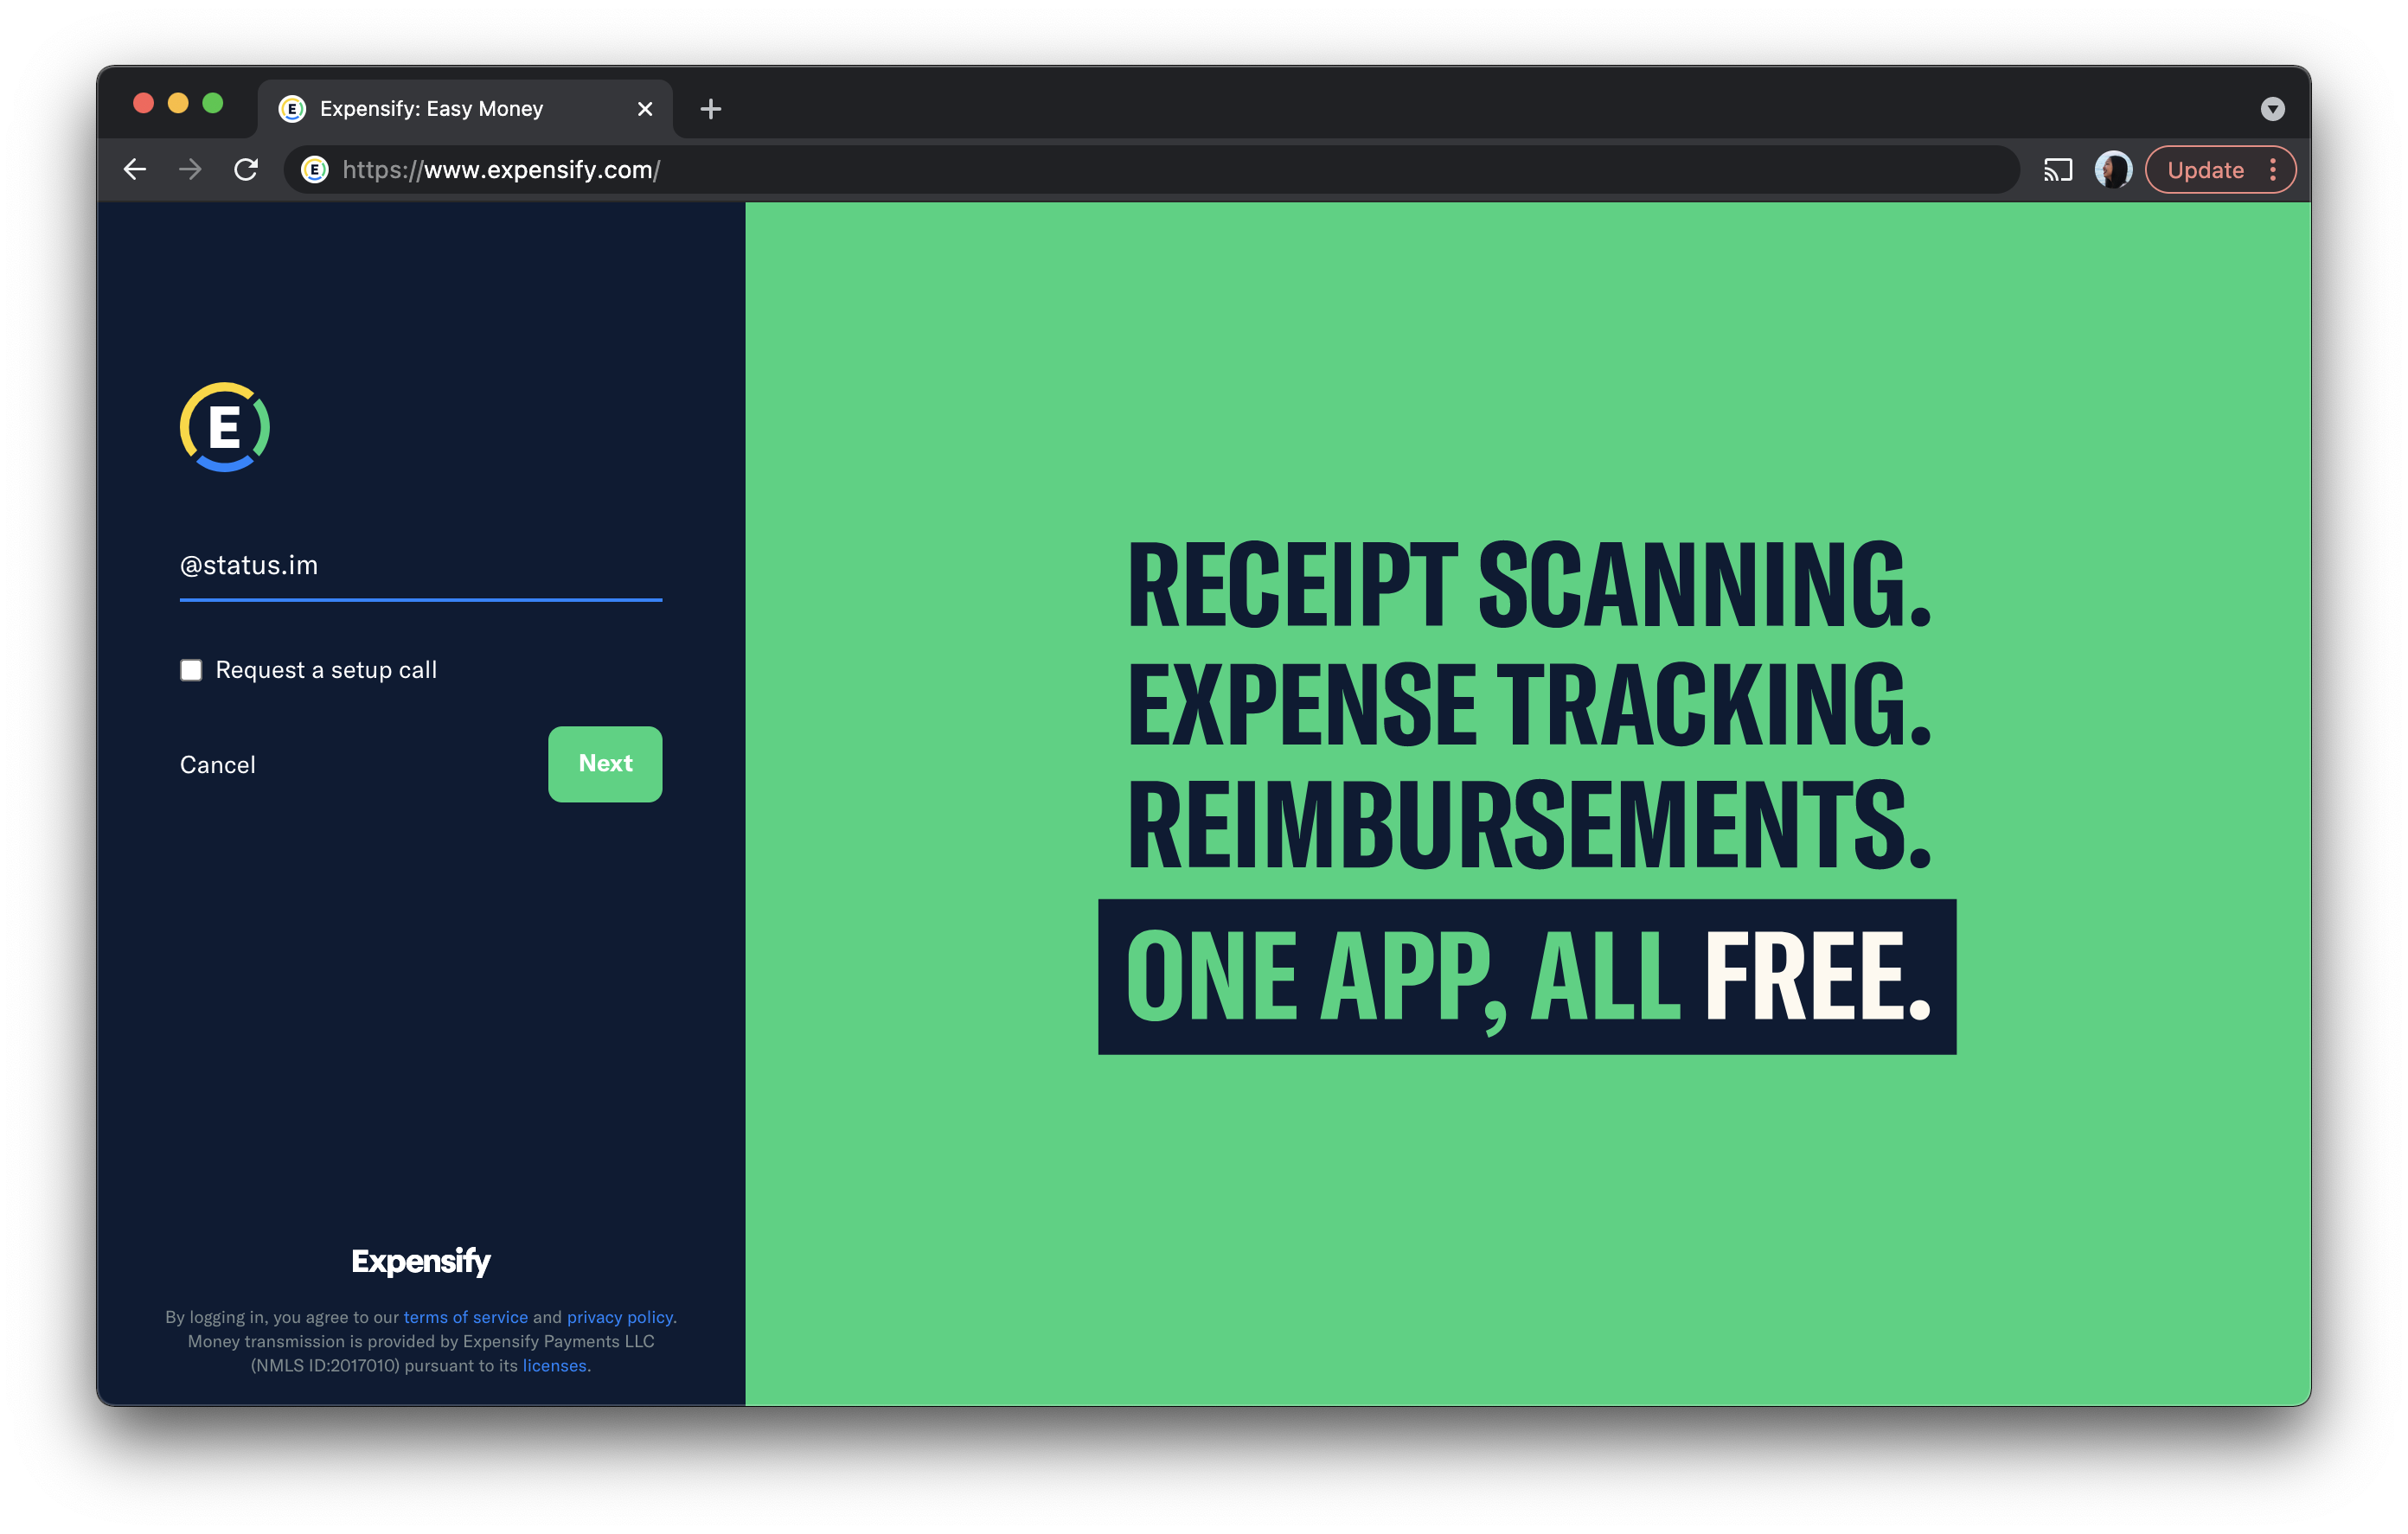
You'll need to head to the Expensify web or download the mobile app and sign in using your Status (@status.im) email to get started. Please input your full name as it appears in your BambooHR profile when setting up your Expensify account.
If you don’t have access to your account, please reach out to the Finance team to create or update your account.
1. Log into Expensify.com
If you don’t have access to your account, message us on our #finance channel to create or update your account.
Once you have logged in please ensure that you are claiming your expenses under the correct policy. Your policy should match the correct project for example "IFT - Finance" or "Status-Mobile"

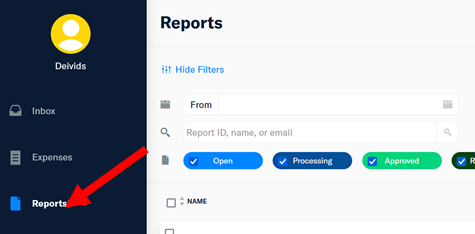
2. Go to Reports
Please use the ‘Reports’ tab instead of the ‘Expenses’ tab as this will allow you to submit multiple claims together. This makes it easier for you and Finance to approve and track your expense claims.
3. New Report
Create a new report for your expenses. One report can include multiple expenses hence it is important for you to submit this as a report and not as an individual expense claim.

4. Add Expenses
Click ‘Add Expenses’ to start adding claims to your report.

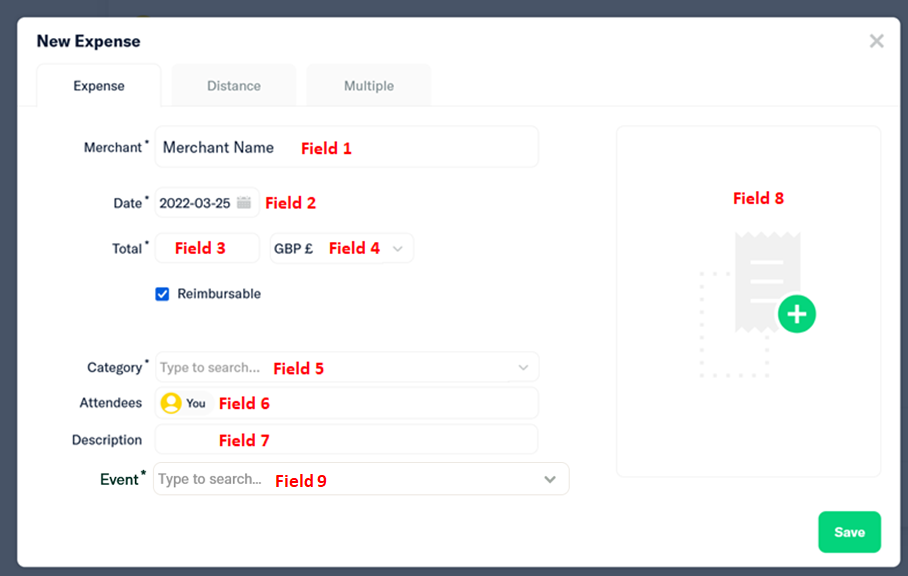
5. New Expense
Create a new expense. Do not use previously created expenses from the available list. It’s important to create a new expense even for recurring expenses as we need up-to-date information for each claim. Any outdated expense claims will be rejected.

6. Fill in the expense claim
It is mandatory to complete all of these fields according to the requirements below! Please ensure that you complete a separate claim for each expense. Joint expenses will be rejected and will require 2nd submission.
Merchant (Field 1) - The name of the company/brand/service provider used for the expense claim
Date (Field 2) - Date when the expense took place. This needs to match the date that is on the expense invoice/receipt which you will attach in ‘Field 8’
Total (Field 3) - Either the total amount spent or the maximum allowable amount per claim (e.g. for coworking or hardware expenses). If you are claiming the expense in full, please record the exact amount as seen on the invoice/receipt which you will attach in ‘Field 8’
Currency (Field 4) - Choose the same currency as on the receipt/invoice of your expense (shown in ‘Field 8’). Expensify will automatically calculate the correct exchange rate for your invoicing currency.
Category (Field 5) - Choose the category of your expenses (e.g Hardware, Travel…)
Attendees (Field 6) - If this is your own expense, then please leave it as it is; however, if you attend a team meal and you paid for everyone else’s meal as well, please tag them in the attendee's fees as this expense covers multiple contributors.
Description (Field 7) - Please specify the event you are attending and the reason/additional information for the expenses. This is an important field and will enable us to track event spending.
Document (Field 8) - attach an invoice/receipt that proves your expense claim and confirms the details shown in fields 1-7.
Events (Field 9) - for all travel expenses select the event you are attending. If the event you are going to is not available, please message us on our Discord #ask-finance channel.
7. If you have multiple expense claims repeat steps 4 - 6.
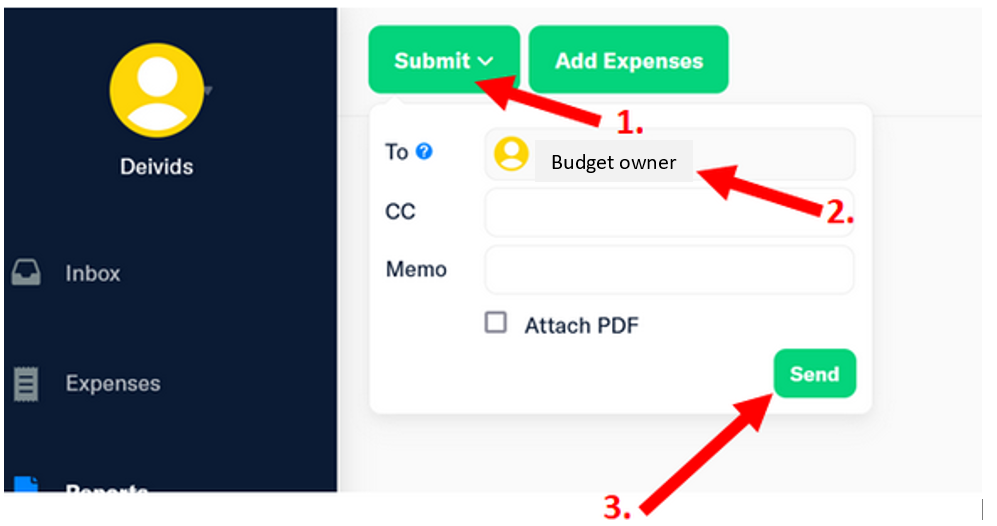
8. Submit Expense Report
8.1 Click ‘Submit’ 8.2 Check you are submitting to your correct budget owner 8.3 Your approval will be sent to the budget owner for review and approval. Once it is approved, you will be able to add it to your monthly contributor invoice. 8.4 Submit the report
9. Adding expenses to your monthly contributor invoice
Your final expense report will be presented in USD so please convert this to your invoicing currency. Please use the FX rates available on https://www.xe.com/currencytables/
Only approved expenses should be included on your monthly invoice. If your expense has not been approved, it is the Budget Owner who will need to do this before Finance can reimburse your expenses.
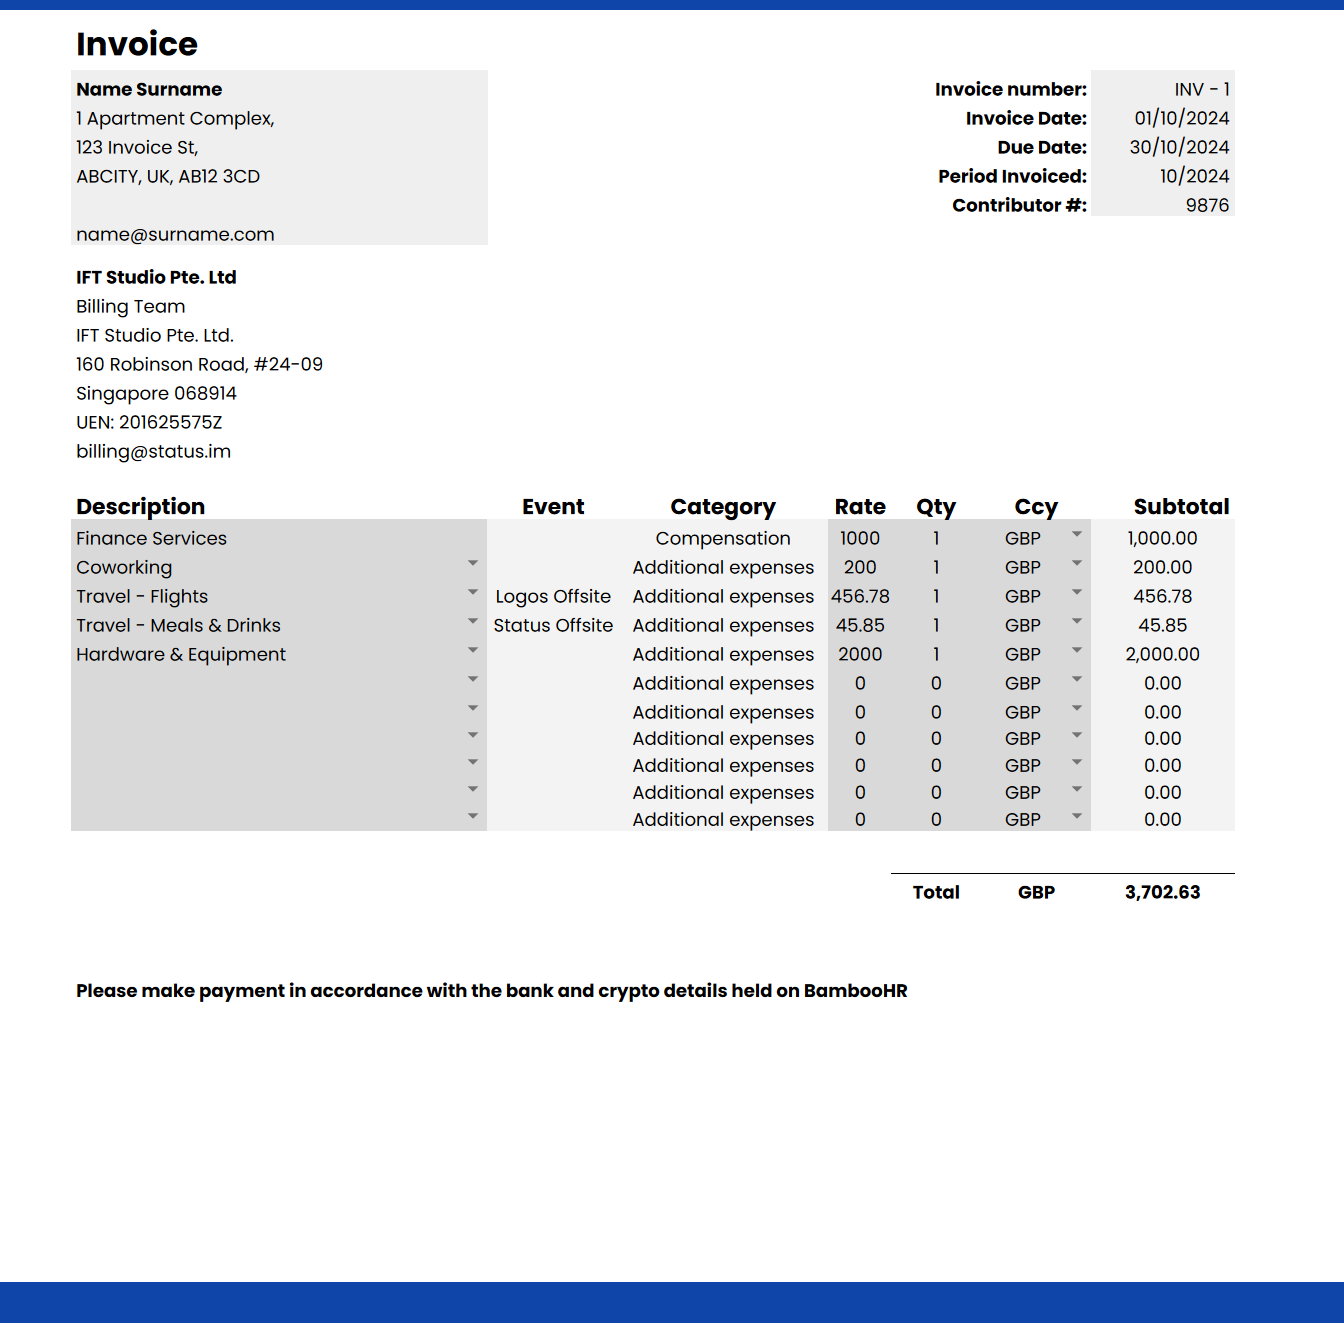
Ensure that each Category of expense is recorded as a separate item on a separate line. For example, all hardware expenses can be recorded together on your monthly invoice however, travel expenses would require a separate line/item for each category of travel expenses (Flights/accommodation/meals, etc). For travel and event expenses, please state the event on your invoice.
As guidance, we have added these categories in the invoice template here. Please, ensure your invoice has the same category names as the Expensify reports to avoid delays with the expense claim approval.
Your expenses claimed on Expensify must match the expenses claimed on your monthly invoice. An example of this is shown below:
If you have any questions about the process, feel free to post a question on Discord in the #finance channel.
If you would like to set up these categories in your accounting software, please ask the Finance team for the complete list of expense categories.
If you need to share the report with your accountant, you can download a PDF report with your expenses by clicking on the top right corner and then on the Download icon.
When are you getting reimbursed
In order to reduce delays in payments, invoices received after the invoice deadline (15th of the month), will be paid in the payment run of the following month. This applies to all invoices (contributors and third-party suppliers). We will still issue the normal reminder before the cut-off date, but we will not chase invoices after that date.
Expense reimbursements are paid together with the monthly compensation invoice. If you have questions or concerns regarding the expense reimbursement date, please get in touch with the Finance team, and we'll be happy to help you with that.
Example Scenarios:
Scenario 1:David submits an invoice on the 16th of February. This invoice was received after the payment cut-off date for February, so it will be paid in the following payment run.
Scenario 2: David submits an invoice on the 14th of February, and he includes an expense claim that shows as not approved in Expensify. The Finance team will reach out to David, to amend the invoice. If the invoice is not amended on time before the payment cut-off date, it will not be included in the payment run.
Scenario 3: David submits an invoice on the 15th of February, and he includes an expense claim that shows as approved in Expensify. The Finance team will include it in the payment run as usual.
If you have other questions related to this process, please feel free to ping the Finance team in the #finance channel or through an email to [email protected].